
Last updated on April 26th, 2026 at 03:08 pm
Have you ever wished for a single tool that could organize your tasks, track your goals, and capture your thoughts,all in one place?
Enter the bullet journal: a flexible, analog system that helps you plan your days, reflect on your progress, and unleash your creativity.
This article is a complete step-by-step guide for a beginner to start with bullet journaling. What you’ll be reading right now contains all the ‘technicalities’ of a bullet journal- the spreads, logs etc., which are the ‘ideal’ way of doing it.
Table of Contents
What Is a Bullet Journal?
A bullet journal (often called a “BuJo”) is a customizable organization system developed by Ryder Carroll.
It combines elements of a planner, diary, to-do list, and sketchbook into one notebook. The core idea is to use rapid logging,short, bulleted entries,to track tasks, events, and notes efficiently.
The beauty of a bullet journal is its flexibility: you can adapt it to fit your life, whether you’re tracking daily habits, planning projects, or simply jotting down thoughts.
Why Start a Bullet Journal?
- Boost productivity: Keep all your tasks, appointments, and ideas in one place.
- Increase mindfulness: Reflect on your goals, habits, and progress.
- Reduce digital overload: Escape screens and enjoy the tactile pleasure of pen and paper.
- Get creative: Design layouts, doodle, and personalize your journal to your heart’s content.
What You Need to Start
Starting a bullet journal is refreshingly simple. Here’s what you’ll need:
- A notebook: Any notebook will do, but dotted or grid notebooks are popular for their flexibility.
- A pen: Choose one you enjoy writing with. Many enthusiasts recommend fine-tip pens, but any pen works.
- Optional supplies: Colored pens, highlighters, stickers, washi tape, and rulers for added flair.
Don’t get bogged down in supplies,start simple, and add extras as you go.
- Is It Necessary to Make a New Bullet Journal Every Year?
- About Me Bullet Journal Ideas: Telling Your Story, One Page at a Time
- Bullet Journal Ideas for Beginners
- How to Decorate Your Bullet Journal
- How to Write a Bullet Journal Using Calligraphy
- The Story Behind the Bullet Journal
The Core Components of a Bullet Journal
Let’s break down the essential building blocks of a bullet journal:
1. The Key
The key is your personal legend,a set of symbols that represent different types of entries. Common symbols include:
| Symbol | Meaning |
| – | Task |
| o | Event |
| – | Note |
| * | Priority |
| > | Migrated |
| < | Scheduled |
Place your key at the front of your journal for easy reference. Feel free to customize it to suit your needs.
2. The Index
The index is your bullet journal’s table of contents. As you fill your journal, list the page numbers and topics here, so you can easily find information later. Leave two to four pages at the front for your index.
Example:
| Page | Topic |
| 1-2 | Index |
| 3 | Key |
| 4-7 | Future Log |
| 8-9 | January Log |
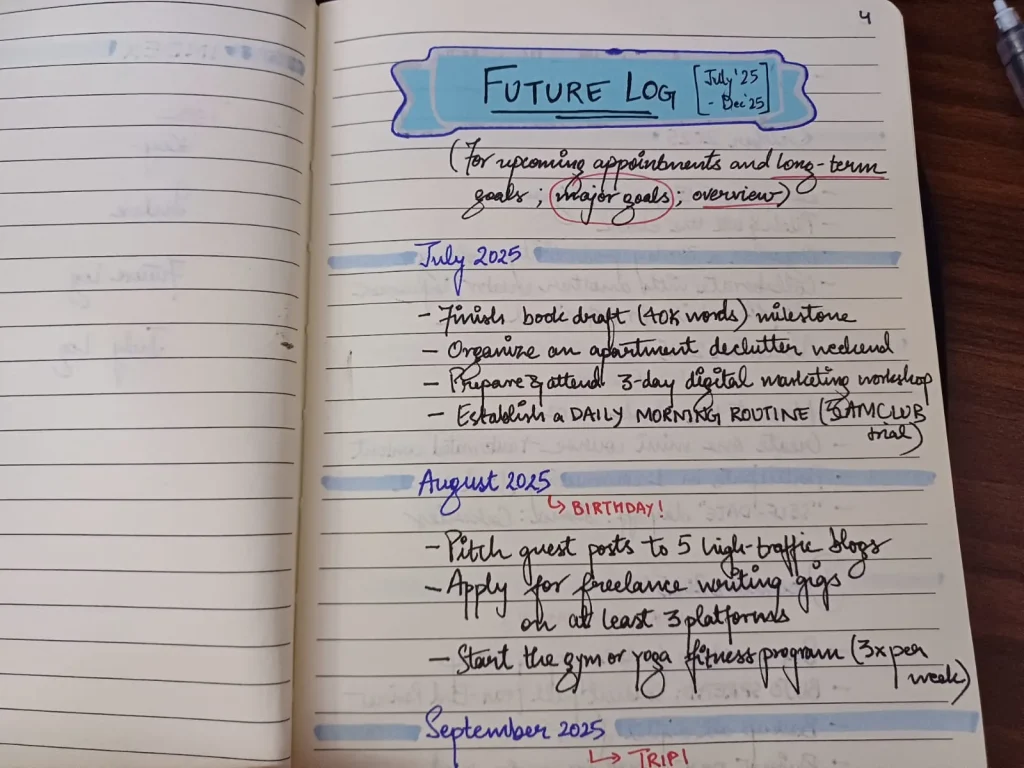
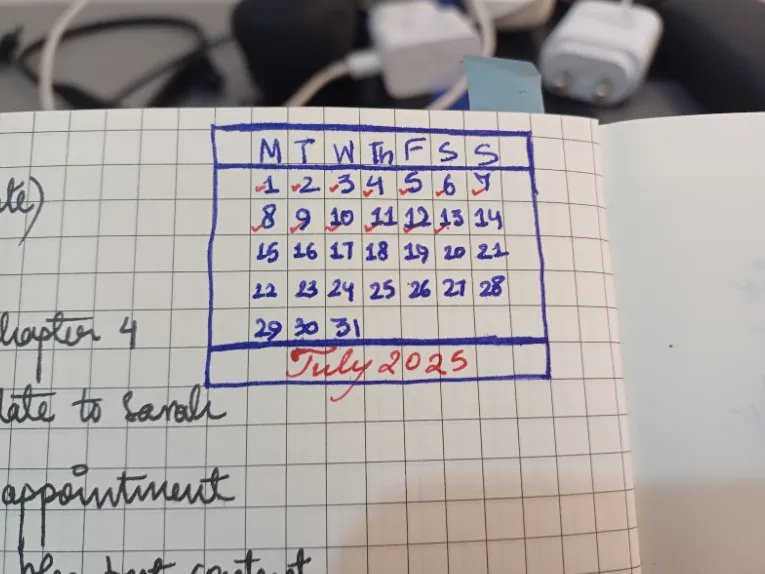
3. The Future Log
The future log is where you record upcoming events, appointments, and long-term goals. Divide a spread (two facing pages) into sections for each month, and jot down important dates as they come up.
How to Set Up:
- Title a spread “Future Log.”
- Divide it into 6 or 12 sections (one per month).
- Add events, deadlines, and plans for the months ahead.
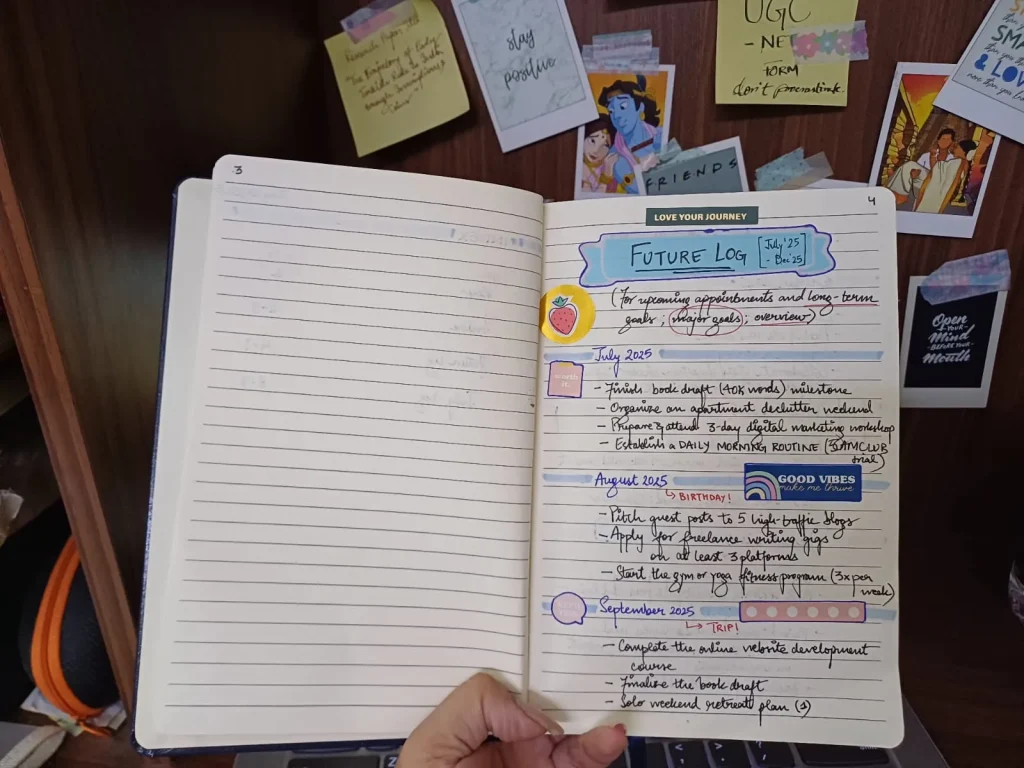
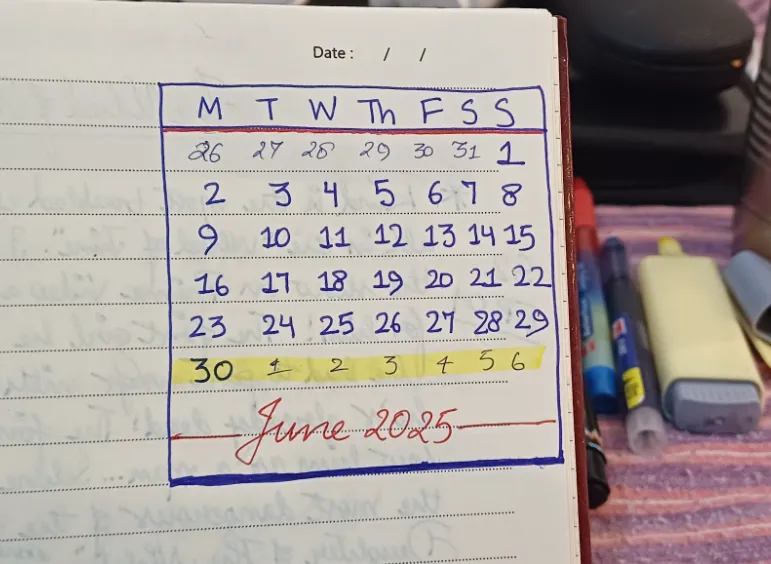
For a simple future log, have a look at this:-
Now, while there are many elaborate ways to layout the aesthetics of this spread, I usually add some stickers to add a pop of color & aesthetics:-
Why is a ‘future log’ spread included? To give us a breakdown of big tasks that need to be done for your dream achievements. Eventually, in a monthly log, you’d be entering the smaller steps you take each day to complete these big tasks of your future log.
Future log = overview of big tasks.
Also Read:
4. The Monthly Log
The monthly log gives you an overview of the month ahead. You can make your headers like:-
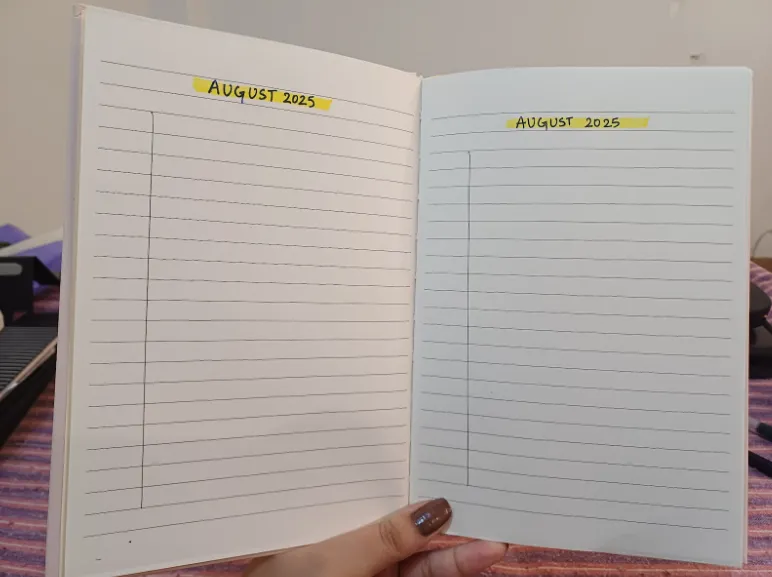
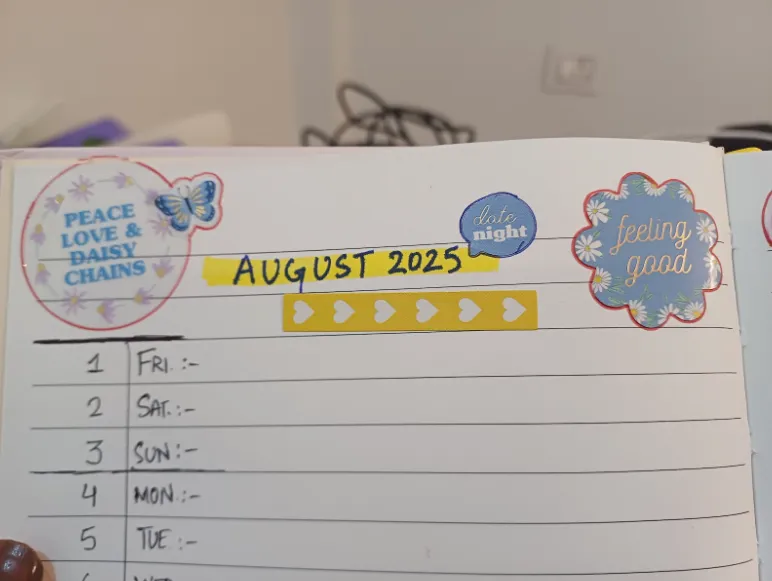
There are two common formats:
- Calendar format: List the days of the month down the side, and note appointments or events next to each date. I recommend to use this if you already have an established routine and want to either plan your after- work/university hours or just want to focus on getting one ‘side gig’ of yours done.
- Task list format: Create a list of tasks to accomplish during each month.
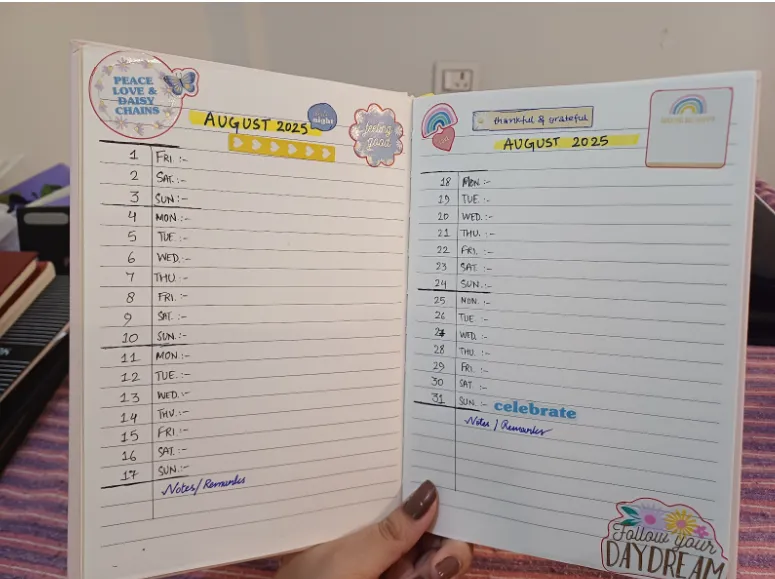
How to Set Up:
- Title a page “January” (or your current month).
- List dates and days of the week down the page.
- Add events and appointments.
- On the facing page, list monthly goals and tasks.
5. The Daily Log
The daily log is where you track your day-to-day tasks, events, and notes. Each day, write the date at the top of a new section, then use your key to log tasks, events, and notes as they come up.
How to Use:
- Write today’s date.
- List tasks (- ), events (o), and notes (–).
- Mark completed tasks with a tick.
- Migrate unfinished tasks to the next day or month with a “>.”
6. Collections
Collections are custom pages for anything you want to track,habit trackers, reading lists, project plans, gratitude logs, and more. When inspiration strikes, create a new collection, title it, and add it to your index for easy reference.
Popular Collection Ideas:
- Habit trackers (great way to hold yourself accountable for the habits you want to develop but are unable to)
Habit tracker- when you want to do things multiple times a day:
- Books to read (when you have a record of what kinds of books you have read, you can analyze what genre you like and what kind of opinions you’re developing.)
- Meal plans (one of the best ways to get your food habits sorted. Tells you a lot of about your lifestyle and health practices)
- Fitness logs (Are you consistent with working out or not? The urge to put a ‘tick’ across this box every single day can be enough motivation to get you started)
- Budget trackers (I think these were useful before India came up with United Payments Interface, but are still a relevant spread if you want to keep a physical overview of your expenses)
- How to Make a Minimalist Bullet Journal
- How to Add Pages to a Bullet Journal
- How to Make a Bullet Journal on Lined Paper
- How to Draw a Calendar in a Bullet Journal
- How to Create a Bullet Journal in OneNote
The Bullet Journal Process: Step by Step
Step 1: Set Your Intentions
Before you start, ask yourself: What do I want from my bullet journal? Do you want to be more productive, track habits, or simply have a creative outlet? Clarifying your intentions will help you design a system that works for you.
Step 2: Set Up Your Journal
- Number your pages (if your notebook isn’t pre-numbered).
- Create your key on the first page.
- Set up your index on the next two to four pages.
- Add your future log,a spread for the next 6–12 months.
- Create your first monthly log for the current month.
- Start your daily log on the next blank page.
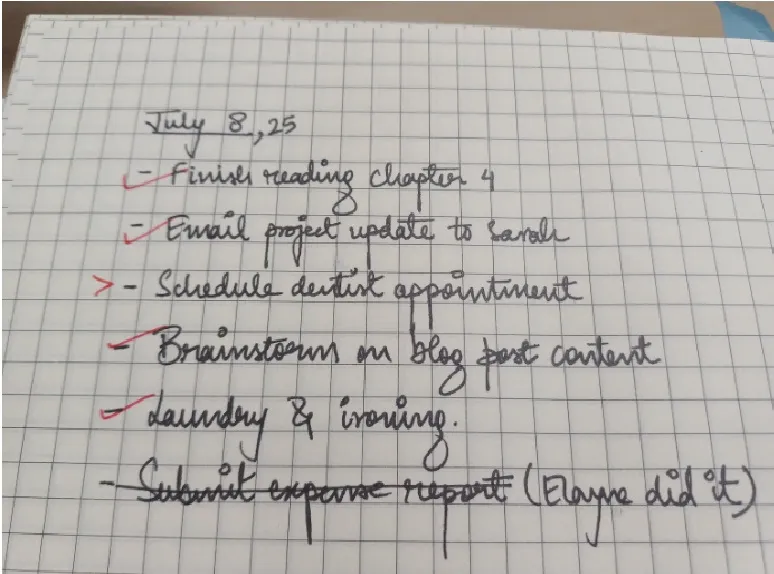
Step 3: Start Rapid Logging
Rapid logging is the heart of bullet journaling. Use short, bulleted entries to capture tasks, events, and notes. Don’t worry about making it perfect,just get your thoughts down quickly.
Example:
text
July 7
• Finish blog post draft
o Doctor’s appointment, 3pm
– Idea: Start a gratitude collection
Step 4: Review and Migrate
At the end of each day, week, or month, review your logs:
- Mark completed tasks with an “X.”
- Migrate unfinished tasks to the next day or month using a “>.”
- Strike out irrelevant tasks.
- Update your index with new collections or important pages
This process, called migration, helps you focus on what matters and let go of what doesn’t.
Step 5: Experiment and Customize
Your bullet journal is yours,make it work for you! Try different layouts, experiment with trackers, or add artistic touches. If a spread doesn’t work, change it up next month. The only rule is to keep it useful and enjoyable for you.
- How to Write Quotes in a Bullet Journal
- How to Take Meeting Notes in Your Bullet Journal
- How to Set Up a Bullet Journal for School
- How to Put Your Ideas in Bullet Journal
- How to Draw Banners for Your Bullet Journal
Tips for Bullet Journal Success
- Start simple: Don’t overwhelm yourself with elaborate spreads. Begin with the basics and add more as you go.
- Be consistent: Set aside a few minutes each day to update your journal.
- Review regularly: Reflect on your progress and adjust your system as needed.
- Don’t compare: Your bullet journal doesn’t need to look like anyone else’s,focus on function over form.
- Make it fun: Use colors, stickers, or doodles if you enjoy them, but don’t feel pressured to make it “Instagram-worthy.”
- How to Make a Mood Tracker Bullet Journal
- How to Start a Simple Bullet Journal
- How to Make a Digital Bullet Journal in Keynote
Common Bullet Journal Mistakes (and How to Avoid Them)
- Trying to do too much at once: Start with the core modules,key, index, future log, monthly log, daily log. Add more as you get comfortable.
- Getting stuck on aesthetics: It’s easy to get caught up in making your journal look perfect. Remember, function comes first.
- Not reviewing or migrating tasks: Regular review is essential to keep your system effective.
- Neglecting your journal: If you miss a day (or a week), don’t stress,just pick up where you left off.
Sample Bullet Journal Layout
| Page | Content | Example Entry |
| 1 | Key | – Task, o Event, – Note, * Priority |
| 2-3 | Index | 4: Future Log, 8: January Log, 12: Books List |
| 4-7 | Future Log | Jan: Doctor appointment, Feb: Vacation |
| 8-9 | January Log | 1: New Year’s party, 2: Project deadline |
| 10+ | Daily Logs | July 7: – Finish report, o Meeting at 2pm |
| 12 | Collection | Books to Read: “Atomic Habits,” “1984” |
- How to Use a Bullet Journal for Weight Loss?
- How to Use a Bullet Journal Effectively
- How to Use a Bullet Journal for Work‘
- How to Use Washi Tape in Bullet Journal
- How to Write Neat in a Bullet Journal
- TV Show Tracker Bullet Journal
Final Thoughts
A bullet journal is more than just a planner,it’s a powerful tool for organizing your life, reflecting on your goals, and expressing your creativity. The best part? There’s no right or wrong way to do it. Start simple, experiment, and make it your own.
Remember: The bullet journal is a system designed to serve you. Let it evolve as your needs change, and don’t be afraid to make mistakes along the way. Happy journaling!